
Be a Pirate Treasure Locations: Where to Dig and How to Sell Chests
Where to dig up treasure in Be a Pirate: find the glowing gold dig spots on lootable islands, stow chests in your ship's hold, and sell them at Starter Port.
Quick answer
Dig treasure on lootable islands: look for sand that glows gold, dig it, and a chest pops out. Carry the chest to your ship, sail back to Starter Port, and let Goldtooth Gus at the Treasure Broker open it for coins and items.
- A glowing gold patch of ground is the treasure spot — the game's own hint says 'Dig where the ground glows gold'.
- Some islands, like the crab island, also have loose chests sitting right on the beach.
- Your helm screen shows the destination name and a live distance, so you can steer straight back to Starter Port to sell.
Treasure in Be a Pirate follows one simple loop: sail to an island, dig up a chest, haul it aboard, and sell it at the port. Here is where to look, what a treasure spot looks like, and how to get paid.
Where you can dig up treasure
Treasure is dug on lootable islands, and early play centers on the destinations around Starter Port. Small Island is the classic first run — the helm marker tracked the short trip there (reading "Small Island - 108m" at one point), and digging on the island produced a wooden chest. The crab island hides loose chests on its beach, and quests point you toward Coral Island, listed as the "Coral Isles east of the port".
You do not have to memorize the map. While you are at the helm, the screen shows a destination marker with the island's name and a live distance readout, the objective banner names your next goal (like "RETURN TO STARTER PORT", "Starter Port - 210m"), and the compass displays a region banner such as "CALM SEA". On one sail-out, beach islands in Calm Sea held open loot — another place to look for chests when you head that way.
Destinations worth knowing
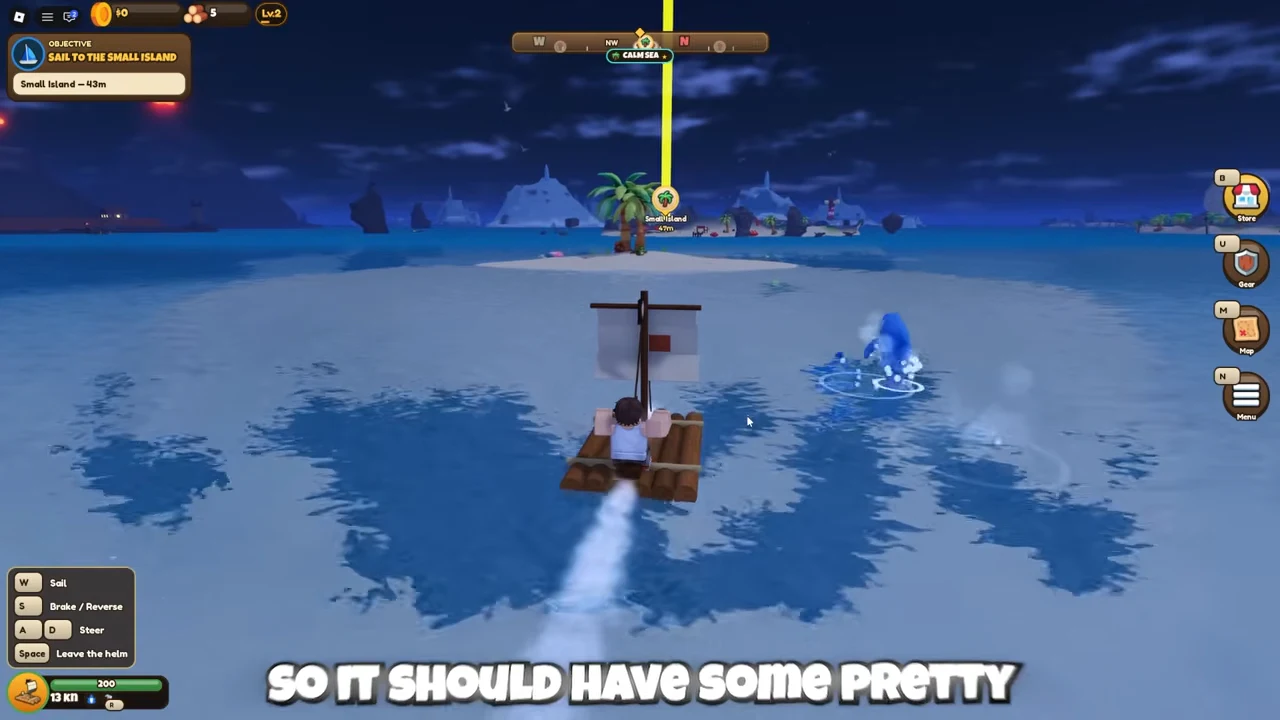
Small Island
A short sail from Starter Port and the classic first dig — its glowing spot yielded a COMMON TREASURE wooden chest listed at about $120.
Crab Island
Crabs on the shore give it away, and loose chests sit out in the open on the beach.
Coral Island
Named as the 'Coral Isles east of the port' in quest objectives, so missions will send you here.
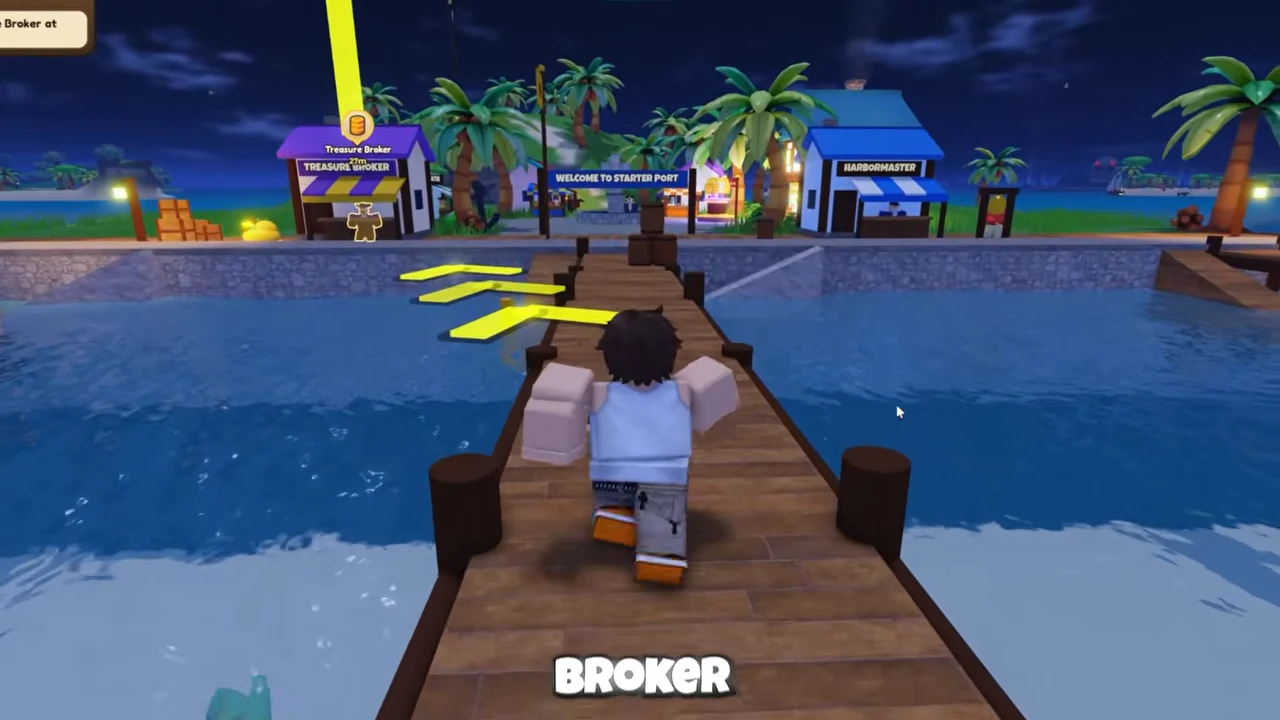
Starter Port
Home base under the 'WELCOME TO STARTER PORT' sign, with the HARBORMASTER stand and the Treasure Broker shop that opens your chests.
Calm Sea
The region banner your compass shows early on — on the shown run, its beach islands held open loot.
Cursed Sea
The green-fogged region where a shark sank an under-geared Dinghy; save it for a sturdier boat.
How to recognize a treasure spot
The game tells you exactly what to look for. Step onto a lootable island and the objective reads "FIND THE TREASURE" with the hint "Dig where the ground glows gold" — so scan the sand for the glowing gold patch and dig there. A successful dig pops "YOU STRUCK TREASURE!" and a chest bursts out, like the COMMON TREASURE wooden chest worth about $120 that came out of Small Island's glowing sand. The chest card puts it plainly: it "jumps into your arms when it lands. Carry it to your ship!"
The recorded Small Island dig, from the glowing spot to the chest card:
Watch the full guide on YouTube.
Not every chest is buried. On the crab island, loose chests sat right on the beach — crabs scuttling along the shore were the tell that the island had loot. Grab what is free to take, but do not be surprised if a chest refuses to budge: some belong to other players and cannot be picked up.
The dig-and-sell loop
Every treasure run follows the same sequence from helm to payout:
How the cycle works
Sail to a lootable island
Steer toward a named destination — the helm marker shows its name and live distance as you go.
Dig where the ground glows gold
The island objective 'FIND THE TREASURE' points you to the glowing sand; dig until 'YOU STRUCK TREASURE!' pops and a chest bursts out.
Carry the chest to your ship
The chest lands in your arms — haul it aboard and it stows in the hold, tracked by a counter like 'Stored in Hold: 1/2'.
Sail back to Starter Port
The objective flips to 'RETURN TO STARTER PORT' with a live distance so you can helm straight home.
Open the chest at the Treasure Broker
Goldtooth Gus at the Starter Port shop opens chests for coins plus items — one chest paid out $280 and a bandana.
With the hold empty again, sail out and loot the next islands, and sinking enemy boats adds their loot on top.
When a chest won't come with you
Two things can block a haul, and both have simple answers:
Problems and fixes
The hold won't accept another chest
Your ship's hold is full — it stows only so many chests, and a small early boat showed 'Stored in Hold: 1/2'.
Suggested responseSail back to Starter Port and open your chests at the Treasure Broker to free up space, then head out for another run.
A loose beach chest won't pick up
That chest belongs to another player.
Suggested responseLeave it where it lies and dig a glowing spot or grab a different chest instead.
Watch the water on the way home
The early runs shown here stay in Calm Sea, but the green-fogged Cursed Sea is another story: a shark there destroyed an under-geared Dinghy — one that had picked a fight with it first. Until you are in a sturdier ship, treat the Cursed Sea banner as a place to avoid, not a shortcut.
Treasure is not only in the ground, either. Sinking an enemy pirate boat yields its loot as well — after sinking one boat, the player sailed straight back to port and opened the haul at the broker — so it pays to keep your cannons ready while you sail. That is the whole early treasure loop in Be a Pirate: glowing sand, a chest in your arms, and a broker waiting at Starter Port.
For more on each step, see the Be a Pirate sailing guide for helm controls and navigation, the cargo hold guide for stowing chests, the selling guide for the port side of the loop, the combat guide if you would rather take loot from other pirates, and the progress fast guide to keep the coin rolling in.
Related Guides
Selling Guide: Where to Sell Chests & What They Pay
Find the Treasure Broker at Starter Port, see what each chest pays, and plan the fastest sell loop for steady coins.
Cargo Hold: Capacity & What to Do When Full
Understand your ship's hold limit, what the Stored in Hold counter means, and what to do when the hold fills mid-run.
Sailing Guide: How to Take the Helm & Sail
Master the four helm controls, cast off from port, and steer to any island or port using the live distance readout.